

How To Run Cobol Program In Windows
This tutorial walks yous through the steps to create your first Hello COBOL Earth application and demonstrates the basic features of the Visual Studio Integrated Development Environment (IDE).
Create a project
- To outset the Visual Studio IDE:
- Windows 7 and Earlier
-
- From your Windows desktop, click Offset > Visual Studio 2017.
- Windows 8.1
-
- From your Windows desktop, click the Visual Studio 2017 tile.
- Windows x and Later
-
- From your Windows desktop, click Beginning > Visual Studio 2017.
If this is the kickoff time y'all accept started Visual Studio on your car, you lot are prompted to specify default environment settings. Choose General Development Settings.
The windows yous see open in Visual Studio and their layout depend on whether yous have used the IDE before and on the edition of Visual Studio that you might have installed on your machine. Yous tin move, resize and minimize windows which is why they may not look exactly similar described here.
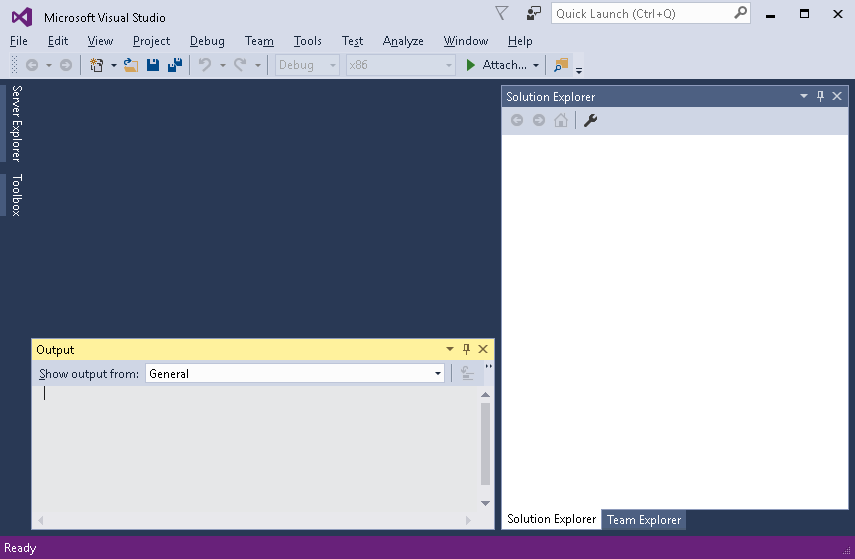
You lot can meet:
- The Start Page which you tin close.
- The Solution Explorer window which gives a direct view of what is on disk for your solutions.
A solution is a holding place for projects that relate to the solution. For instance, the solution y'all are going to piece of work with contains two projects - a batch project and an online project.
- Bottom right is a Properties window which shows the properties of the currently selected item in the Solution Explorer.
- Output window - displays the results of tasks and from compiling your applications.
- Error List Window - displays details about whatever errors that might be present in the lawmaking.
- Project Details Window which gives a logical view of your COBOL application.
- The main activity window at the meridian the IDE, the Editor, is where you edit or debug the sources. This window is currently empty.
- Autonomously from the menus, there are a number of buttons in the toolbar, which vary depending on what you are currently doing with the IDE.
- Experiment with resizing, minimizing and restoring the windows.
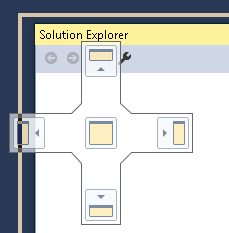
To move a window:
- Click the championship bar of the window. Holding the mouse on the window title, drag the window to the left and downwardly.
Note: If y'all close a window, you lot tin restore if from the View menu.
If you wish to restore the default windows layout of the IDE, click .
- Click the championship bar of the window. Holding the mouse on the window title, drag the window to the left and downwardly.
- In Visual Studio, click .
- In the New Projection dialog box, aggrandize .
- Select Native.
- In the eye pane, select Console Application.
- Specify a name for your project such as HelloCOBOLWorld, specify a location as needed, and click OK.
This creates a solution (which is a container for projects), and a projection with a skeleton COBOL program. The solution and the project are displayed in the Solution Explorer view. The program is loaded in the Visual Studio editor.
Add together a source file
To demonstrate how you create new files in a project, you are going to create a new source file that will concord the source lawmaking for the Hello COBOL World awarding:
- Correct-click your project in the Solution Explorer, and click Add > New Item.
- In the Add New Item dialog box, ensure that COBOL program is selected.
- Specify a proper noun such as helloworld.cbl and click Add.
This creates the file in your project and opens it in the editor.
- You can delete the skeleton program that was created when yous created the project - right-click Program1.cbl in your project in the Solution Explorer, and click Delete.
Confirm that yous want to delete the file.
- In the code within the new file, navigate to the line that contains process partitioning. where you demand to add your executable statements. Place the cursor at the end of the line and printing Enter.
This creates a new line in the file and the cursor is positioned correct after the grey margin area in the AB expanse. By default, the COBOL editor is configured for smart editing and does non position the cursor in the COBOL margins areas.
- Type the code to write some text in the console:
display 'Hello COBOL World!'.
- Click File > Save All.
Build the application
Now that you lot have added some code that can be executed, you can build your project. Because this is a projection that creates a console application, building will produce an executable file in a subfolder of the project which is specified in the project's properties. To build the application:
- Select the solution in Solution Explorer and click Build > Build Solution.
The progress of the project build is displayed in the Output window. It shows that the build has succeeded and where the executable file is. If at that place were any issues with the build, the IDE displays the Error List window. You tin open up these windows manually from the View card.
Your projection was built successfully so yous can now run the application.
Run Hello COBOL Globe
To run the application from Visual Studio:
- Click Debug > Outset Without Debugging.
This opens a command window that shows Hello COBOL World.
- Press any cardinal to shut the panel.
Preserve this solution and project because you are going to use it again for a different demonstration included in this Introduction.
What Next?
Go along with the next tutorial, Configuring the How-do-you-do COBOL World Awarding, which shows how to configure a project to locate the copybooks that are not in the project directory.
Source: https://www.microfocus.com/documentation/visual-cobol/vc40pu8/VS2017/GUID-83393D52-B89D-49FA-80DC-854B607F4E16.html
Posted by: morrisonvand1982.blogspot.com
0 Response to "How To Run Cobol Program In Windows"
Post a Comment